71 Media: Images & Best Practices
Pressbooks allows you to add interactive elements to your book, which are referred to collectively as “media.” Pressbooks enables you to include three types of media in your book: images, audio and video. All media file uploads must be under 10 MB, but we recommend keeping them under 2 MB.
This chapter focuses on images. You will learn:
- How to upload image files into the Media Library
- How to insert an image file into your post
- How to add images from URL
- How to control the placement and appearance of your image file
- How to create a gallery
- Best practices for handling images in Pressbooks
- How to link to an image from a text hyperlink
- How to link to a larger image from a thumbnail image in a webbook
1. How to Upload Image Media Files
There are two ways to upload images files: 1) from the left-side dashboard menu, you can access your media library and add or delete files or 2) as you’re writing, you can insert media in a chapter, front matter, back matter or part.
To upload media files using the media library:
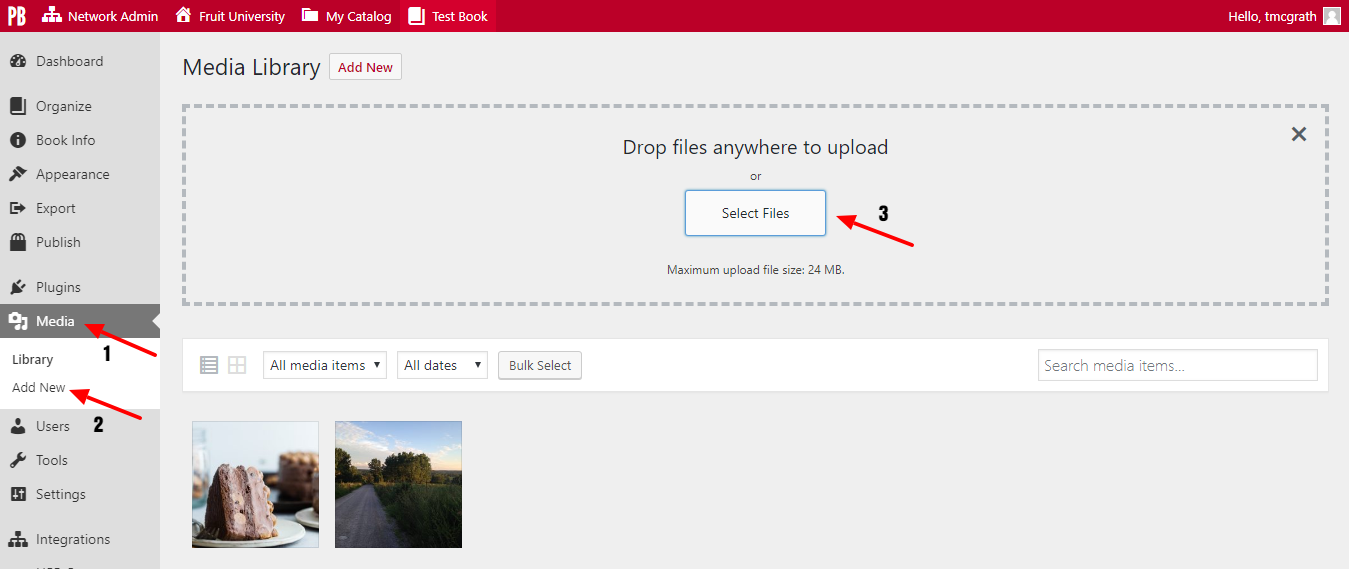
- Go to your dashboard.
- Click on Media.
- Your library will appear.
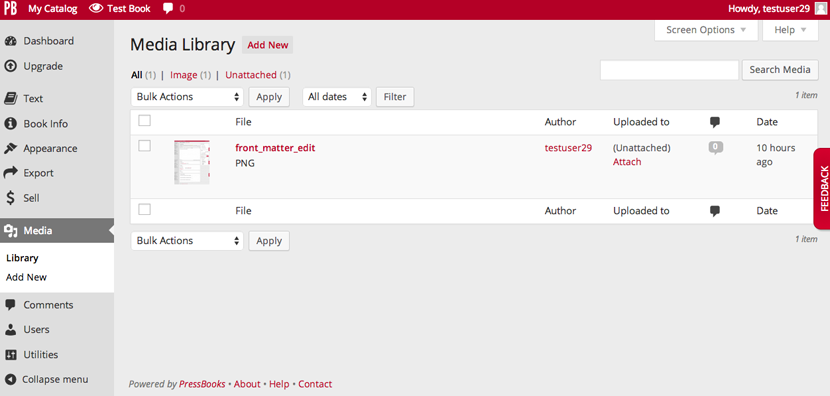
- Click Add New either in the left menu or at the top of the main panel.
- A screen will appear where you can upload your images.
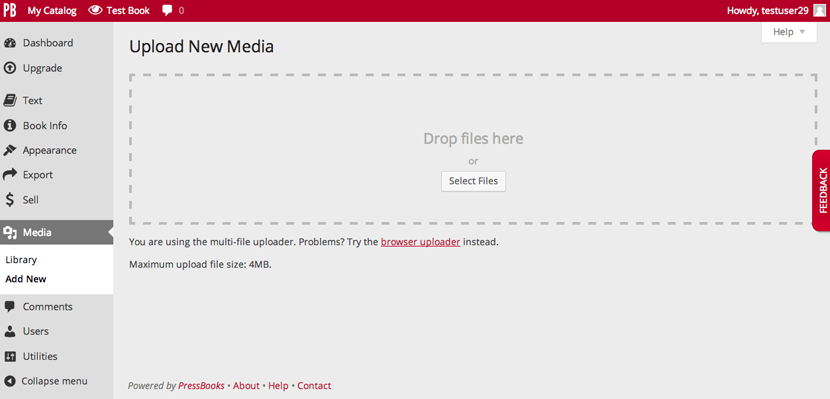
- You can drag files from your computer onto this screen.
- Or, click on Select Files to browse for the correct media files on your computer. Click on the file names and the files will upload.
- To edit files you have uploaded, click on Media Library.
- Hover over a file to see the options, then click Edit.
2. Uploading Image Files from Within a Post
- Go to the post in which you would like to add an image.
- Put your cursor where you would like the image to appear.
- Click on Add Media.
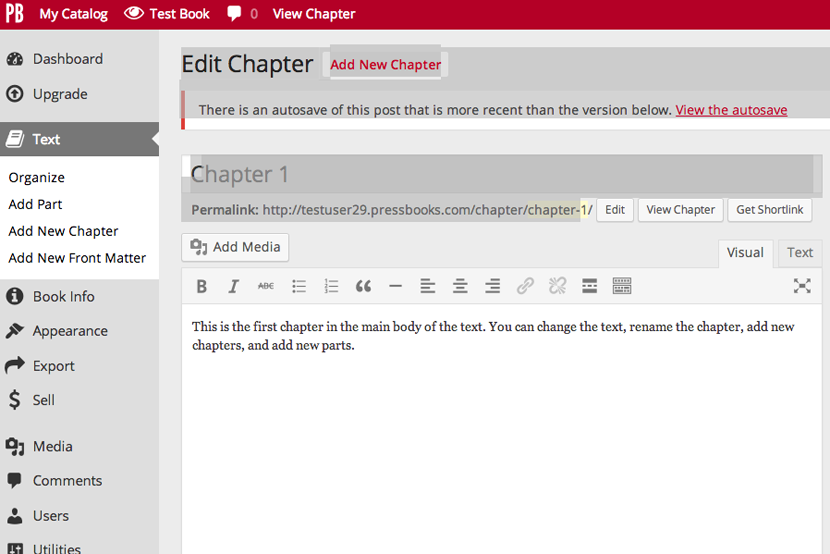
- The Insert Media screen will appear.
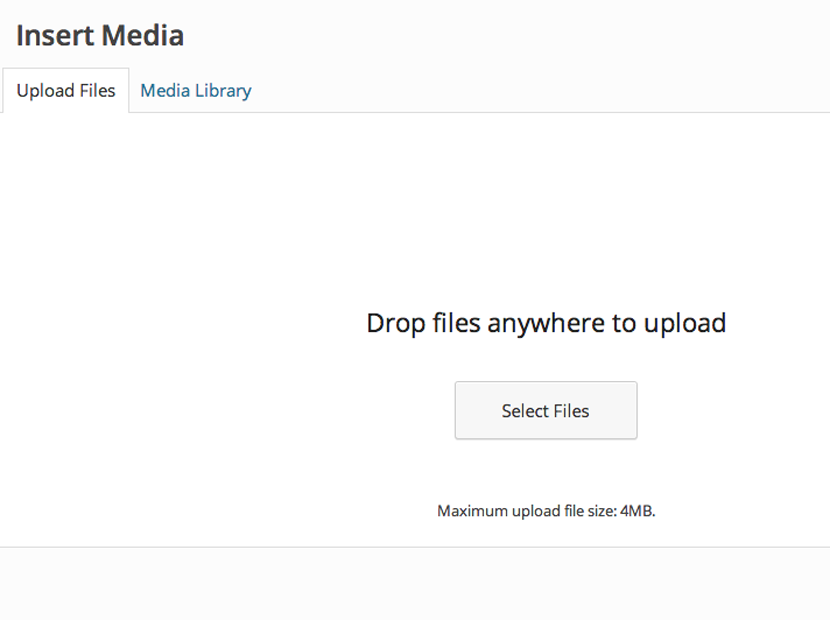
- An interface will appear with the option to drag and drop or select files.
- You can also find and select a file that you have already uploaded previously by clicking on Media Library.
3. Upload Image from URL
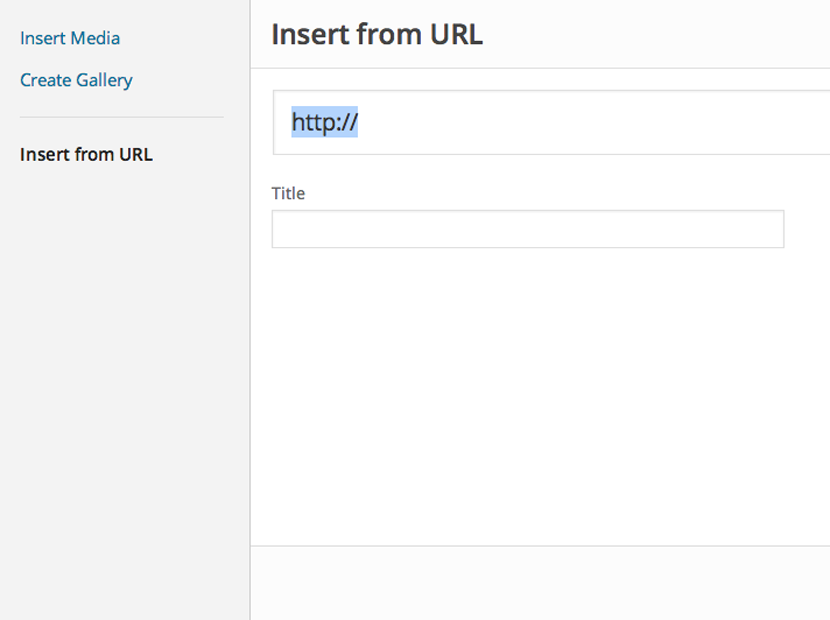
When you are uploading media from within a post, you can also click on Insert from URL to pull in a link to a photo on the Internet. This image will not be added to your media library.
4. Controlling the Appearance and Placement of an Image
Once you’ve uploaded your image and inserted it where you want it, for best results, you’ll want to give it some styling.
- Once your image uploads, click on it.
- The Attachment Details menu will appear to the right.
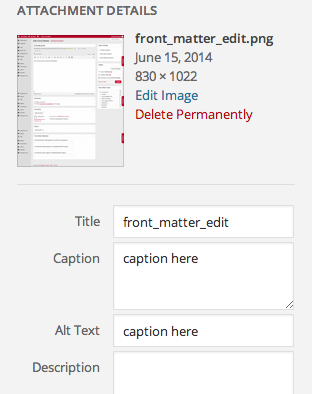
- Critical: Give your photo a caption. Photos without captions will not render properly in all e-readers.
- It’s best practice to write Alt Text, which will be read to visually impaired readers by a screen reader or accessibility device.
- Add a Title and Description for your image here.
- Scroll down.
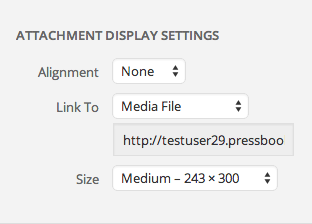
- Select the preferred alignment for your image.
- Have your image link to itself, or somewhere offsite.
- Choose the size at which your image will display. (You’ll want to know your publisher or bookstore’s specs.)
You can edit your images in Pressbooks. More on that in the next chapter, Image Editing.
Image Sizing and File Preparation
We get a lot of questions about how to prepare images for upload into Pressbooks. Those questions are answered in this blog post.
Prefer to watch and learn? Here’s a brief visual intro to adding images in Pressbooks.
5. Create a Gallery
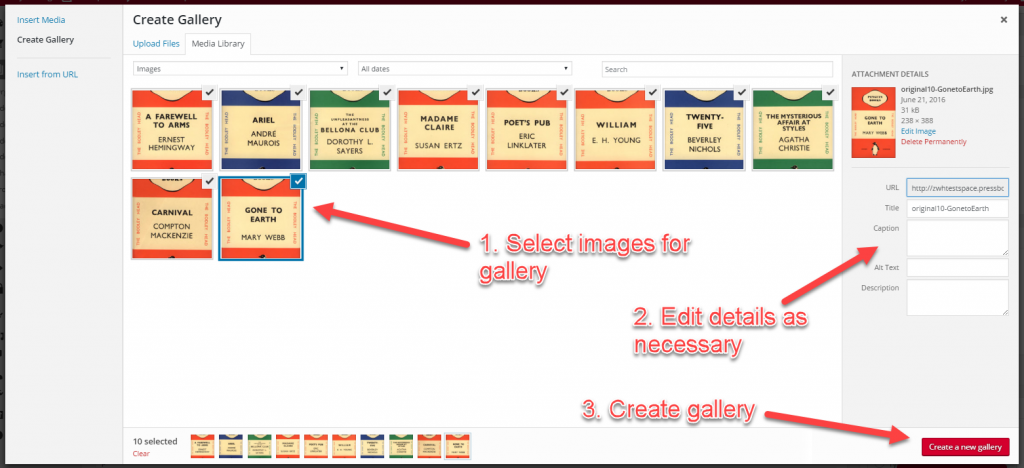
When uploading media from within a post, you also have the option to create a gallery. This allows for several images to be inserted into a post simultaneously, and to be formatted together.
- Click “Add Media”, then “Create Gallery”
- Select images for gallery from media library, or upload new files as detailed in section 2 above
- Click “Create New Gallery”
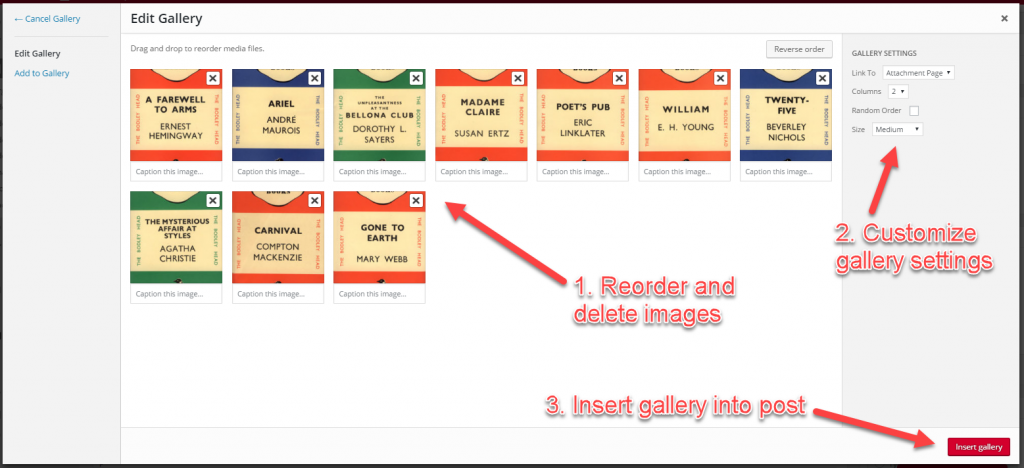
- Reorder and delete media files as needed
- Customize gallery settings on right hand menu (Link to, columns, order, image size)
- Insert gallery into post
6. Best Practices for Working with Images in Pressbooks
For best results, you’ll want to utilize best practices when working with images for your ebook and print book outputs. Refer to this article on using images in Pressbooks for important tips and tricks.
7. Link to an Image Using a Text Hyperlink
To have an image open from a text hyperlink in a light box, follow these steps:
- Add the image to your media library by going to Media > Add New
- Select your file by clicking Select File
The file should then appear in your media library.
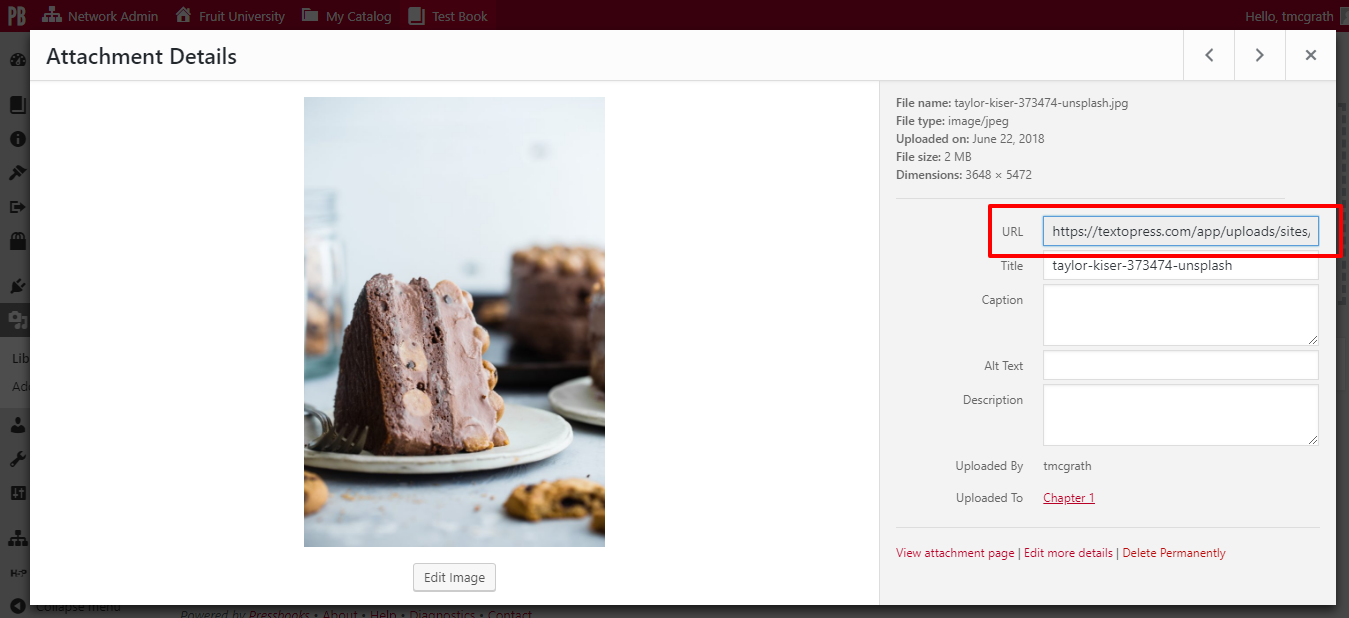
- Click the desired image in your library to access the Attachment Details screen
- Copy the image URL
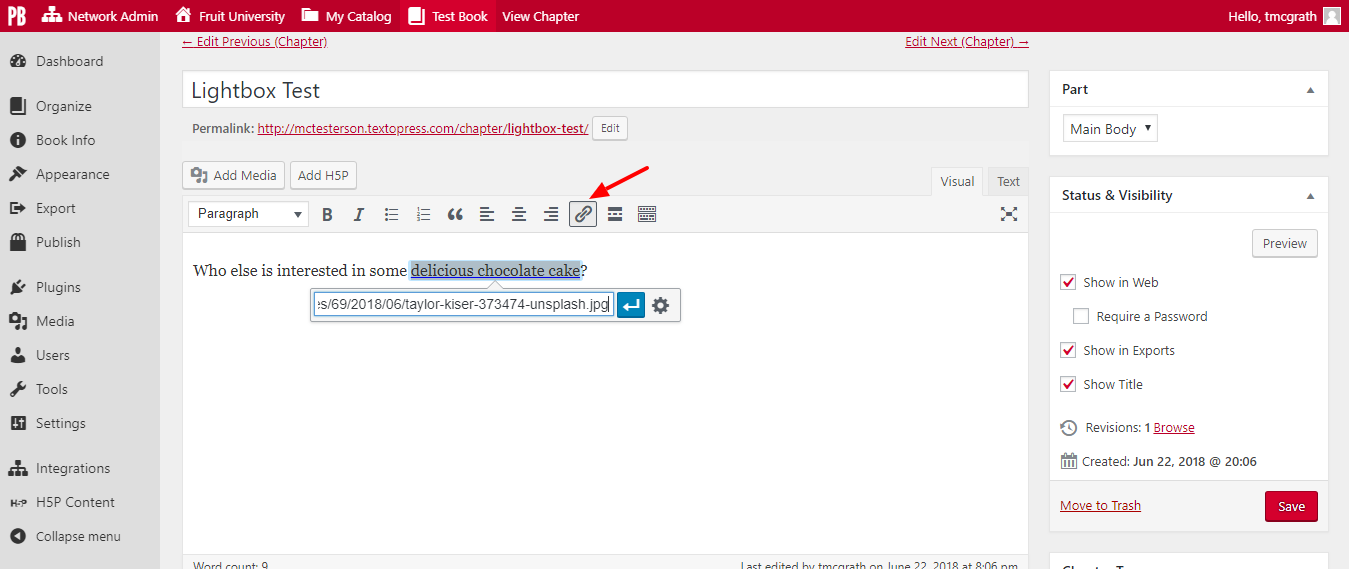
- Open the chapter you want the image linked in
- Highlight the text you want the image to link from
- Click Insert/edit link from the Visual Editor toolbar
- Paste the URL from the Attachment Details page
- Click the blue arrow to insert the image
- Click Save
8. Make a Thumbnail Open as a Larger Image in a Webbook
To have a thumbnail image open into a larger image in a lightbox, follow these steps:
- Open your chapter
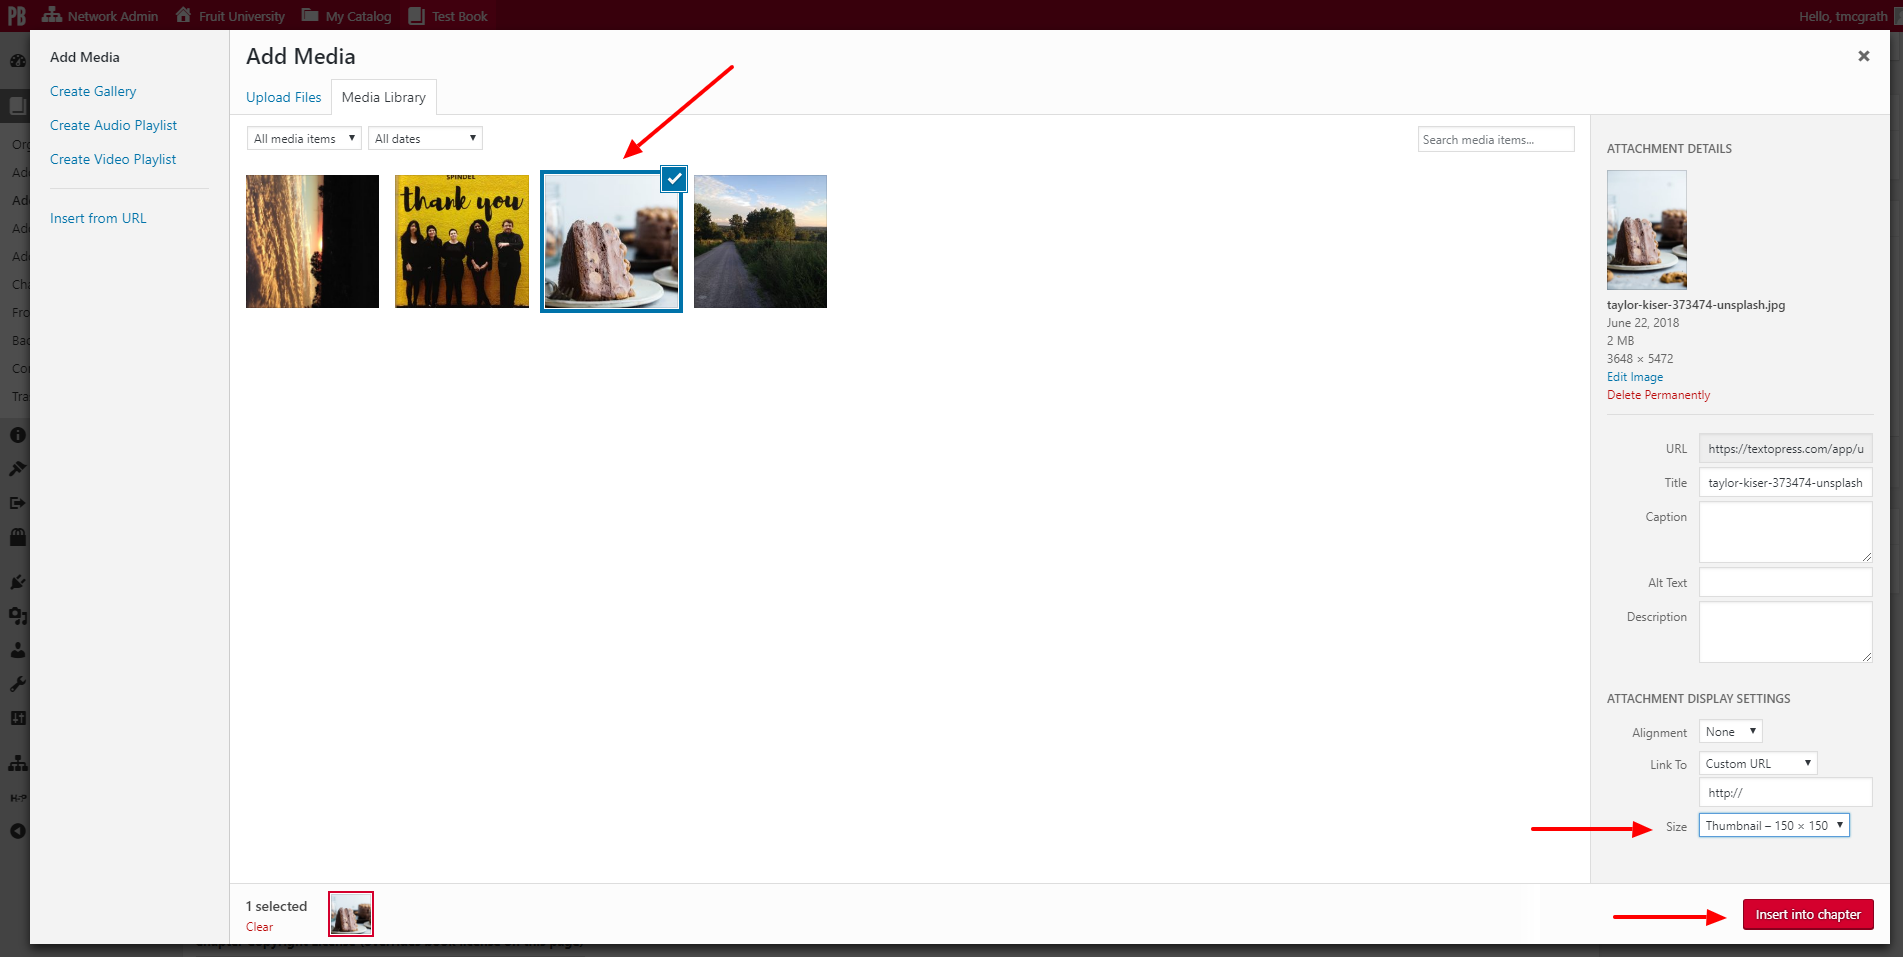
- Click Add Media to choose from existing images in your media library or upload a new image file
- Choose Thumbnail from the drop down menu under Attachment Display Settings > Size in the Add Media window
- Click Insert into chapter
Your image will appear in your Visual Editor.
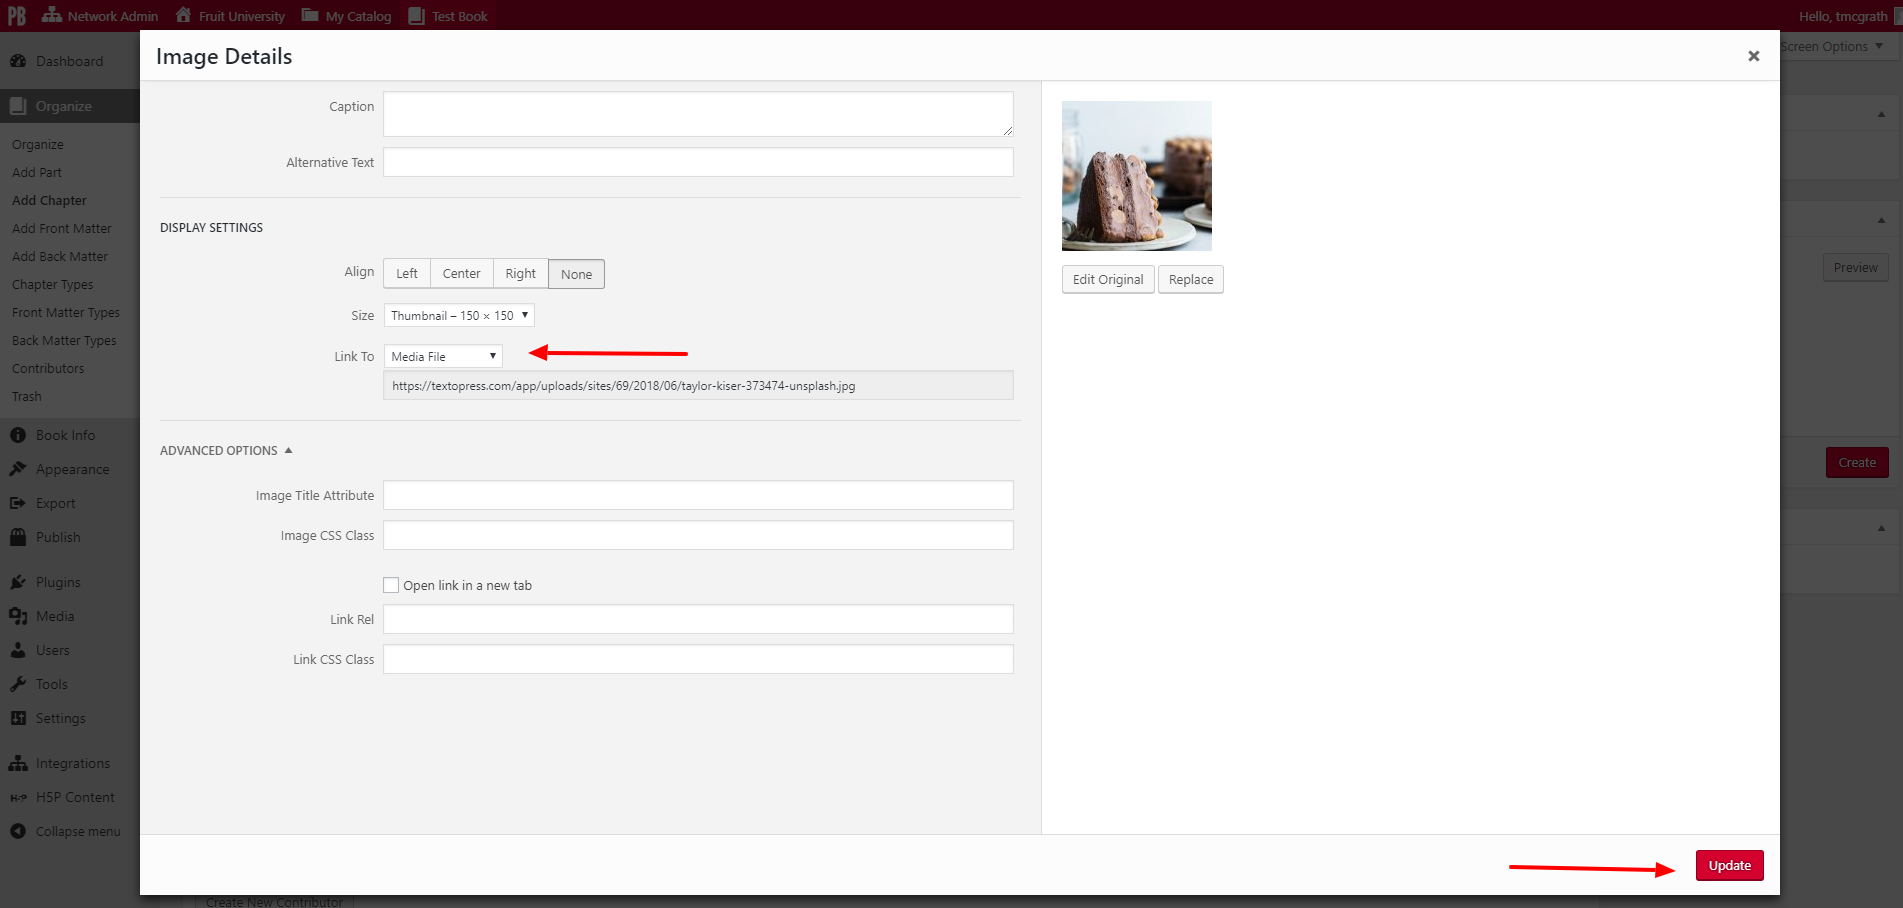
- Click the image, then click the Edit icon
This will open up the Image Details window.
- Click the drop down menu next to Link To and choose Media File
- Click Update
- Click Save on your chapter
Your image will appear as a thumbnail in your webbook, but open as a larger image once clicked.
Go here to read about enabling Lightbox for images in your webbook.

